
Home Improvement
Advantages, Disadvantages and Types of Engineered Flooring

Engineered flooring is a great choice for homeowners looking to improve the look and feel of their homes while also adding additional structural integrity. It is a cost-effective alternative to solid hardwood flooring, providing beauty, durability and sustainability. Engineered flooring can be made up of many layers of materials such as plywood, high-density fiberboard (HDF), or bamboo laminate with a top layer of real hardwood veneer.
These layers are held together using various adhesives or mechanical fastening methods. Engineered floors can be used in almost any space in your home due to their ability to resist warping and shrinking which makes them ideal for use in rooms with moisture like bathrooms and basements. This type of flooring offers an array of styles from traditional wood grain patterns to unique textures that fit any lifestyle or design aesthetic. Check out https://www.thefloorgallery.sg/vinyl-vs-engineered-wood-flooring-which-to-choose-for-that-rustic-touch/ to learn more.
Advantages of Engineered Flooring
Engineered flooring is an increasingly popular type of flooring that can offer more advantages than traditional hardwood floors. It is constructed with multiple layers and a top layer of wood veneer, making it both durable and attractive. Here are some of the benefits that engineered flooring offers.
1. Cost: Engineered flooring is typically cheaper than solid hardwood, so it can be a great alternative for those who want the look without breaking the bank.
2. Versatility: Engineered flooring is available in a wide variety of finishes and styles, so you can easily find one to match your décor or vision for your home. It also comes in different thicknesses and widths, giving you more options when selecting the perfect option for your space.
3. Durability: Because engineered flooring has several layers of material bonded together, it’s much more durable than solid hardwood floors and less susceptible to scratches or dents from heavy foot traffic or furniture movement over time.
4 Installation: Since engineered wood planks are usually thinner than traditional hardwood boards, they’re easier to install — even as a DIY project.
Disadvantages of Engineered Flooring
Engineered flooring is a type of wood flooring that is made up of several layers of different materials, such as plywood, hardwood veneer, and plastic laminates. While engineered floors have many advantages over traditional hardwood floors in terms of cost, installation and durability, there are also some disadvantages to consider.
The most significant disadvantage to engineered flooring is the fact that it cannot be sanded down or refinished like hardwood floors can be. This means that if your floor starts to show signs of wear and tear or starts to look dated after a few years, you will have to replace the entire thing as opposed to refinishing it like you would with hardwood floors.
Different Types of Engineered Flooring
Engineered flooring has become increasingly popular over the last few years, offering homeowners a wide range of benefits. If you’re considering engineered flooring for your home, it helps to have an understanding of the different types available. Here’s a look at the main types of engineered flooring and their unique features.
Laminate Flooring: Laminate flooring is made from several layers of materials that are pressed together in a process called lamination. The top layer is typically made from melamine resin or aluminium oxide, and beneath it are several core layers which help provide stability and durability. One of the main benefits of laminate flooring is its affordability; however, it also offers easy installation and maintenance as well as great resistance to scratches and stains.
Engineered Hardwood: Engineered hardwood floors combine real wood with composite materials that offer extra stability against temperature fluctuations or moisture levels in your home.
Care and Maintenance of Engineered Floors
Engineered floors are a popular choice for many homeowners due to their durability and ease of maintenance. Engineered floors are made up of layers of wood, usually plywood or medium-density fiberboard (MDF) with a laminate or veneer top layer, which can come in almost any type of wood species. This type of flooring is designed to be durable and easy to maintain while still providing the look and feel of real hardwood. While engineered floors can last for decades with proper care and maintenance, certain steps should be taken to ensure that your floor looks its best for years to come.
The first step in caring for an engineered floor is regular cleaning. A vacuum cleaner or broom should be used regularly on the surface, followed by mopping with a damp mop (not wet) using warm water mixed with either mild soap or vinegar solution. It’s important not to use too much moisture when cleaning as this can cause warping and buckling over time.
Conclusion
Engineered flooring is one of the most versatile, durable and cost-effective flooring options available today. It is a great choice for many homeowners looking to update their homes with an attractive, long-lasting material. With its combination of real wood and other materials, engineered flooring offers a unique look that can withstand heavy foot traffic while still being budget-friendly. As technology continues to advance, this type of flooring will only get better in terms of price and design options.
Looking to cut your energy costs without hiring contractors?
Many homeowners think that energy demand can only be reduced with big investments and professional installations. But… many of the most impactful weekend projects that reduce energy waste can be completed in just one weekend!
These tasks don’t cost very much money, are easy to complete, and can lower how much energy your household consumes each month.
How Home Size Influences Energy Demand
Before jumping into what can be done to lower energy demand around the house, it’s worth understanding why some homes use more energy than others.
Remember, homes that have more sq footage will require more energy to function.
Bigger houses have more space that needs heated, cooled and lit. Per the University of Michigan, just doubling the size of a home from 1,000 sq ft to 3,000 sq ft increases the electricity needed by double.
Obviously.
More square footage equals more running of the HVAC system, lights being on in more rooms at once, and more appliances distributed across the home. Understanding how home size influences energy demand can help homeowners make long-term decisions to better control your energy usage costs.
Luckily…
No matter the size of a home, there are simple weekend projects that can help homeowners reduce energy demand. None of these projects listed require hiring an electrician or thousands of dollars in renovations.
Ready to learn what they are?
Weekend Projects That Reduce Energy Demand
Install Air Leak Prevention Around Doors And Windows
This is by far the simplest task to complete.
Here’s the reality: Air leaks introduce outside air into the home and let conditioned air escape through tiny openings. Essentially, the HVAC system has to work harder to heat/cool the space.
Installing weatherstripping and caulking are two of the easiest projects for homeowners to complete in less than a day. Per the U.S. Department of Energy, weatherstripping and caulking can pay for themselves after one year.
Pay attention:
- Exterior door frames
- Window frames
- Pipe/Wire openings
- Where the garage meets the home
Buy a tube of Caulk for $5. Pick up some weatherstripping for under $10. These inexpensive products can reduce monthly energy consumption quickly…especially for larger homes that have more surface area for leaks.
Add Insulation To The Attic
Heating and cooling a home accounts for a significant portion of monthly energy usage. To be exact, about 45% of energy used in a home goes to heating or cooling.
Yikes.
And if the attic is missing insulation, that’s money being lost.
Hot air rises. When warm air can’t be trapped by insulation in the attic, it leaves the home via the roof. During warmer months, that warm attic transfers heat to the rooms below.
Fortunately, adding insulation is a DIY project that can be completed over a weekend. Homeowners can purchase roll out batts or have blown in insulation installed. The goal is to reach the recommended home insulation value for the climate zone.
Bigger homes have more attic space which creates more area for heat to escape. Adding insulation to the attic can create a dramatic difference in monthly bills.
Swap Out Incandescent Light Bulbs For LEDs
Ready to have a project that takes less than 60 minutes?
Replacing incandescent light bulbs is one of the quickest ways to see results. Not only do LED light bulbs use less energy, but they also last longer.
Imagine this…
If a home has 25 light fixtures and they’re all running incandescent bulbs, energy costs are higher than they need to be. By simply switching all of the bulbs to LED, this project can be completed with a trip to the hardware store and another hour screwing in bulbs.
It doesn’t get much more simple than this project. What’s crazy is the amount of energy that can be saved by making this swap.
Install A Programmable Thermostat
The average homeowner heats and cools their residence while they’re not home.
Programmable thermostats help avoid this problem by auto-adjusting the temperature based on the time of day. Have it set to a lower temperature while everyone is at work. Adjust the temperature when the first person gets home from work. Let the system do the work.
Lower energy bills.
When managing the energy demands of a large home, this upgrade can make a huge difference. Many homes come with 2,000+ square feet of space to heat and cool. If no one is home to enjoy it, that’s money being thrown away!
Take it a step further by installing a “smart” thermostat. These thermostats connect to Wi-Fi and learn the patterns of the home. Once installed, energy usage continues to drop.
Insulate And Seal Ductwork
This is a project that most people don’t know about.
Did you know duct leaks can waste 20-30% of air moving through the system? If the ducts aren’t sealed, money is going out every time the HVAC system turns on.
Inspect the ductwork that’s accessible (basement, attic and crawl spaces) and seal any gaps with mastic sealant or metal backed tape.
Remember:
Use metal tape. Normal duct tape isn’t very effective at insulating ductwork.
A majority of these projects focus on sealing the home and preventing loss of heated/cooled air. When air doesn’t have to travel as far, the HVAC system doesn’t work as hard and homeowners save money.
Weekend Projects That Reduce Energy Use: Final Thoughts
Reducing the amount of energy a home demands doesn’t need to be difficult or costly. The projects listed above are proven to help homeowners reduce their energy waste and each can be done in a weekend.
Here’s a quick review:
- Install Caulk and weatherstripping around doors and windows to prevent air leaks.
- Insulate the attic to prevent heat loss.
- Swap out old bulbs for LEDs.
- Install a programmable thermostat.
- Seal and insulate ductwork.
Since bigger homes have a larger home size energy impact, larger homes stand to benefit more from these weekend projects. However, smaller homes can still see a meaningful impact on the energy bill.
The best part about these projects? Each of them can be completed in a single weekend. Choose one to start and work from there. The savings will start to build and speak for themselves.

How do you keep your wooden deck looking like new for decades?
Decks are built, then neglected until problems arise. By then, damage has occurred. Wood that is not properly protected can display cracks, wood rot and decay within eight short years, says a survey of over 100 contractors.
Fortunately, preventative maintenance throughout the year keeps the investment looking great and adds thousands of dollars to a home.
Read on for everything you need to know.
Deck Maintenance: Why It Can’t Wait
Let’s get real…
Wood decking is one of the most attractive options. But it comes at a cost. Failure to maintain wood regularly leads to rot, mold, sun damage and warped boards.
Wood deck maintenance over a 10-year lifespan costs around $4,000 — neglecting maintenance means costly repairs and likely a full replacement down the road.
Deck maintenance season by season isn’t difficult when you know what products to use. Start with the right wood protection. A quality outdoor wood oil with a matte wood oil finish is one of the best bets. It’s absorbed into the wood to condition and hydrate the fibers — keeping out moisture and UV rays. Unlike deck paints or varnishes, it won’t leave a thick, plastic-like coating on the deck.
Smart, right?
Spring Deck Maintenance: Clean, Repair and Prepare
Spring cleaning your deck is the most important time of year.
Winter is harsh to any outdoor structure. Months of snow, rain and freeze/thaw cycles leave damage. Start here to fix problems before they get worse.
Do this every spring:
- Give the deck a thorough cleaning. A deck cleaning product and stiff bristle brush will remove mold, mildew and winter grime. A pressure washer is a great tool too. Just keep it farther away from the boards than you think is necessary.
- Check wood for rot. Push a screwdriver into the wood in various places. If it easily penetrates, the wood is soft from rot and needs replacing.
- Tighten any screws or nails that have loosened over the winter. Also, replace any screws that may have rusted or corroded.
- Take a close look at where the deck attaches to the home. Called a ledger board. Decks fail at this connection point most often. It’s also often neglected when inspecting deck health.
Allow wood to dry thoroughly before applying any new treatment. Wait at least 48 hours. Wood oil traps moisture inside wood if applied while the wood is damp. The goal is to lock moisture out.
Summer Deck Care: Prevent UV Damage
Summer sun is bad news for wood decking.
Sun rays damage wood fibers, cause fading, and lead to cracking over time. Luckily, a matte wood oil finish prevents most of these issues.
Summer is the best time to reapply decking oil. It needs it most when temperatures rise. A fresh coat seals out moisture and hydrates wood fibers — all without the shiny look deck varnish leaves behind.
Summer time maintenance includes:
- Sweeping debris off the deck weekly. Leaves, plants and other organic materials hold moisture against wood.
- Rearrange patio furniture occasionally. Extended exposure in the same spot causes sun bleaching.
- Avoid letting planters sit directly on the wood deck surface. Planter pots trap moisture and cause dark stains.
- Reapply oil in high traffic areas if wood begins to look dry.
Fall Deck Preparation: Before Winter
Fall deck preparation is all about getting the deck ready for snow, ice and cold temperatures. If the deck goes into winter damaged or untreated, spring cleanup will be far more work.
Follow these four steps to prepare a deck for winter:
- Keep deck clear of leaves and debris. Leaves hold moisture against wood and accelerate rot.
- Clean the deck one last time before the freeze. Dirt and grime trapped against wood all winter causes problems.
- Inspect the deck for any damage that occurred over summer.
- Apply a new coat of wood oil to seal wood before cold hits.
Applying decking oil before winter is the most important step of the year. Decking wood that enters winter without protection will soak up moisture during freeze/thaw cycles.
It’s the number one reason wood decks crack, warp and rot.
Don’t skip this step.
Winter Care: Watch for These Things
Winter deck maintenance is easy.
There isn’t a lot to do. But these few habits ensure spring arrives to find the deck in great shape.
- Always use a plastic shovel to remove snow from decking boards. Metal shovel edges scrape and gouge wood surfaces.
- Avoid using rock salt or harsh chemicals to melt ice. They eat away at wood oils and damage wood fibers.
- Check under the deck after heavy rains or snowfalls. Pooling water can occur.
- Keep the deck clear of leaves that may blow in. Leaves in cold weather still trap moisture against wood.
Maintenance done in spring, summer and fall dictates how well a deck weathers winter.
Products Recommended for Year-Round Deck Care
Not all deck treatments are created equal.
Products that penetrate into wood work far better than those that sit on top. For decks, a matte wood oil finish works best because it conditions wood from the inside out.
Things to look for in a quality outdoor wood oil:
- Deeply penetrates into wood grain, not left sitting on top
- Provides UV protection from sun damage
- Repels water to avoid rot and structural damage
- Leaves a natural matte finish — outdoor wood does not look good with glossy finishes
With proper care, wood decks last between 15 and 25 years. Using the right product each season will ensure a deck lives on the high end of that spectrum.
Deck Maintenance Isn’t As Scary As You Think
Season by season deck maintenance isn’t difficult. Sure, it’s work. But dealing with a deck full of problems that should have been caught long ago is far worse.
Takeaways:
- Deep clean, check for damage and treat the deck every spring
- Apply deck protection before and during summer to avoid UV damage
- Prepare the deck before winter — clean and seal wood before snow arrives
- Keep an eye out for damage during winter and remove snow and debris regularly
Follow this guide and the deck will hold up for many years to come.
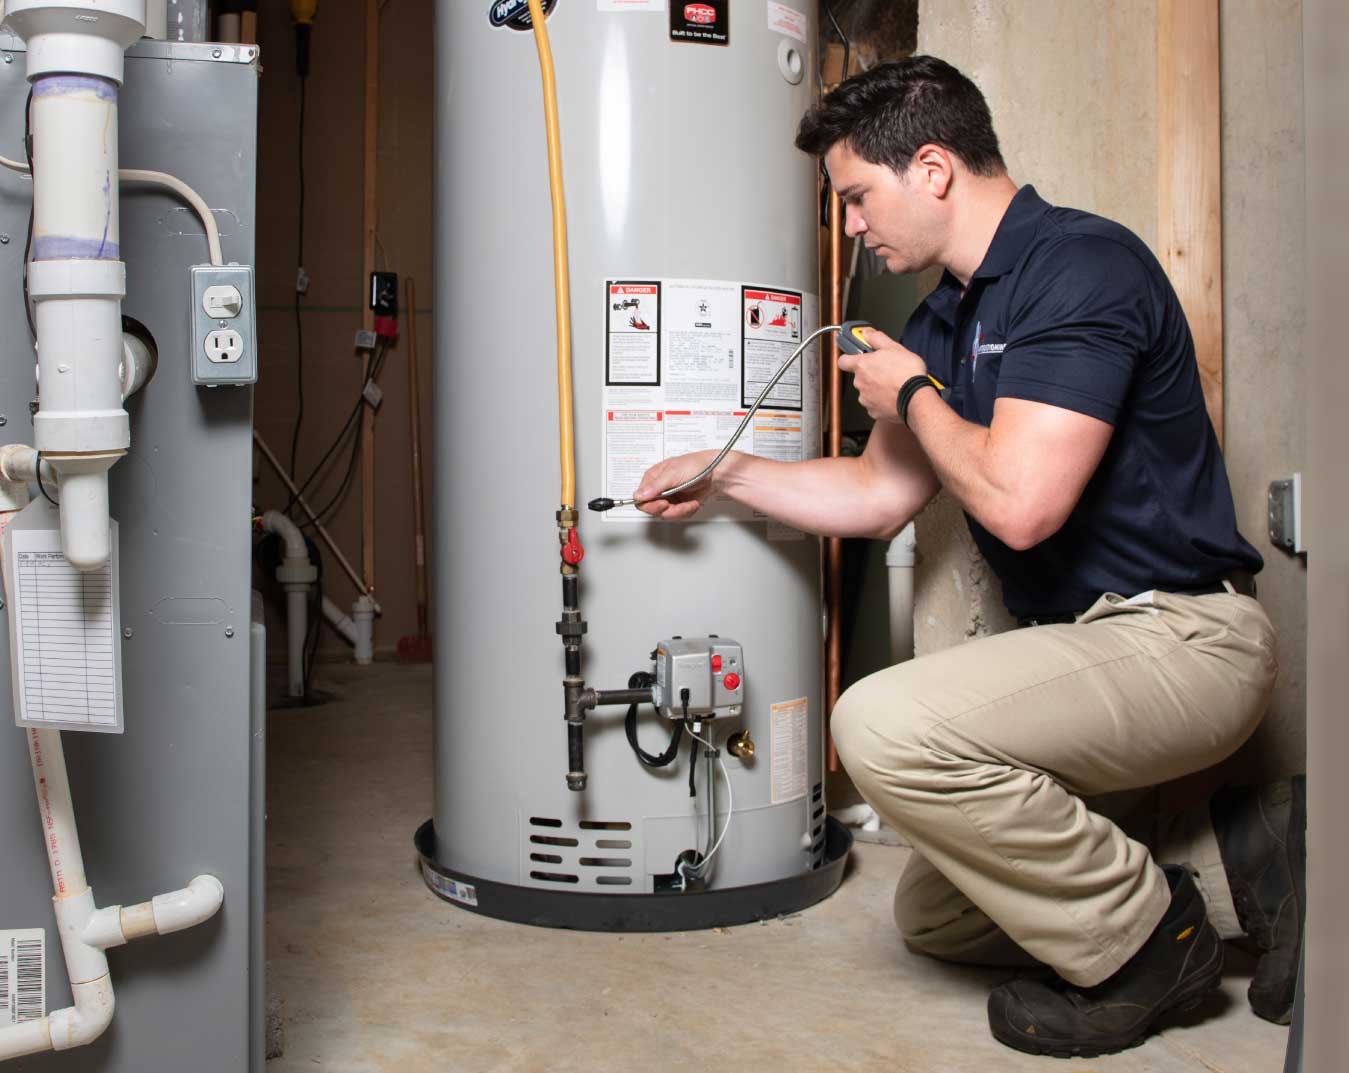
A water heater supports daily comfort in every Phoenix home, yet this vital appliance often goes unnoticed until an issue appears. Many households rely on hot water for cleaning, bathing, and routine chores, so any disruption can create stress and inconvenience. The region’s desert climate places extra strain on equipment, which means proper awareness of potential hazards becomes essential for long-term reliability.
Early signs of trouble tend to appear subtly. It is advisable to contact a professional for water heater repair in Phoenix when unusual noise, temperature fluctuation, or minor leaks emerge. This article outlines key safety issues linked to water heaters in Phoenix and highlights practical ways homeowners can maintain safer operation throughout the year.
High Heat, Hard Water, and Their Hidden Risks
Phoenix temperatures soar for extended periods, and this intense heat affects indoor systems. Water heaters sit in garages or utility rooms that trap heat, which accelerates wear on valves, tanks, and thermostats. Combined with the region’s hard water, the potential for internal damage increases. Mineral sediment often settles inside tanks and places pressure on components that regulate temperature and pressure.
The mixture of heat and sediment encourages accelerated corrosion. Once corrosion begins, safety concerns grow due to weakened metal surfaces. A weakened tank may fail suddenly, which could lead to water damage and potential scald risks. Homeowners benefit from routine checks by qualified professionals who know how local conditions influence equipment performance.
Temperature and Pressure Hazards Every Household Must Watch
A water heater must balance temperature and pressure carefully. When either rises beyond a safe level, the chance of an emergency increases.
Why Temperature Shifts Create Concern
Sudden spikes in water temperature may indicate that the thermostat no longer responds correctly. A malfunctioning thermostat can cause unsafe hot water output. This type of hazard often emerges without warning and places anyone in the home at risk.
How Pressure Issues Lead to Larger Problems
Safe operation depends heavily on the temperature and pressure relief valve. If this valve fails or becomes blocked with sediment, pressure inside the tank can rise far beyond recommended limits. This issue deserves immediate attention due to the severity of potential outcomes.
Homeowners should pay attention to:
- Water that feels hotter than usual
- A valve that drips frequently
- Hissing sounds near the tank
- Rust around valve connections
These signs may point to pressure irregularities that require prompt correction.
Gas Supply Concerns for Homes with Gas Water Heaters
Gas water heaters function well in Phoenix homes, yet they pose their own safety concerns because of fuel supply components. Any issue involving gas should be taken seriously.
Common Warning Signs
- A faint sulfur odor near the appliance
- Flame irregularities
- Soot traces near the burner
- Unusual noise from the burner area
Even slight irregularities may indicate problems that demand expert evaluation. Gas leaks present fire risk in confined spaces, making professional service a priority rather than a convenience.
Importance of Proper Ventilation
Ventilation plays a major role in safe gas heater operation. Without correct airflow, carbon monoxide may accumulate. Modern units include safeguards, but poor installation or long periods without inspection can still create risk. A qualified technician can verify that vents remain clear and that airflow paths function correctly.
Electrical Safety Considerations for Electric Water Heaters
Electric units remove gas-related concerns, yet they introduce electrical challenges that should not be overlooked. Faulty wiring, loose connections, and damaged circuits may cause shocks or fire hazards.
Electrical components must remain dry to operate safely. Small leaks sometimes travel along surfaces and reach wires or heating elements. If moisture contacts electrical parts, the risk increases dramatically. Homeowners who spot moisture near an electric water heater should cut power to the unit and pursue a professional evaluation.
When Professional Support Becomes Essential
Homeowners can handle basic observation, yet many safety issues require specialized tools and knowledge. Equipment inside water heaters involves pressurized water, electricity, or gas. Without proper training, even a minor repair attempt may introduce additional hazards. Phoenix’s unique climate often places extra strain on water heater components, which means expert guidance plays a vital role in preventing future incidents.
Professional technicians understand how local conditions affect heating systems and can address subtle warning signs before they lead to larger damage. Many residents contact specialists for water heater repair in Phoenix once early indicators of trouble appear, especially when unusual noise, odor, or inconsistent temperature changes arise. Skilled support helps preserve efficiency, extend system life, and maintain a secure environment for any household.
Water heater safety deserves careful attention in Phoenix due to intense heat, mineral-heavy water, and specific gas or electrical considerations. Small issues often reveal larger underlying concerns, which makes early identification crucial. A proactive maintenance plan protects equipment and reduces risks that may affect comfort and security. With proper awareness and timely expert care, a water heater can continue to serve any home reliably for many years.


COUNTER-STRIKE 1.6 IN 2026
Click to rate this post! [Total: 0 Average: 0] Picture this: you boot up that old GoldSrc engine in 2026,...

International Casino Operators Expanding into Canada: Key Trends and Regulatory Insights
Click to rate this post! [Total: 0 Average: 0] Canada has rapidly become one of the most attractive markets for...


การทำความเข้าใจฟีเจอร์ของเกมสล็อตผ่าน ทดลองเล่นสล็อต ก่อนเริ่มเดิมพัน
Click to rate this post! [Total: 0 Average: 0] เกมสล็อตออนไลน์เป็นที่รู้กันว่าเป็นเกมออนไลน์ที่เล่นได้ง่ายที่สุด เพียงหมุนวงล้อ หวังให้สัญลักษณ์ตรงกัน และอาจได้เฉลิมฉลองกับชัยชนะเมื่อแสงไฟและเหรียญเริ่มกระพริบบนหน้าจอ นี่อาจเป็นภาพที่คนส่วนใหญ่มีอยู่ในใจเมื่อพูดถึงเกมสล็อต และเพื่อความยุติธรรม ก็ต้องบอกว่า มันง่ายแบบนั้นจริงๆ แต่หลังจากใช้เวลาสักพักลองเล่นเกมต่างๆ ก็จะเห็นได้ทันทีว่า ไม่ใช่ทุกเกมที่จะทำงานเหมือนกัน...


Ten Ways Lightweight Games Continue to Attract Casual Players
Click to rate this post! [Total: 0 Average: 0] Lightweight games have become a major part of the online entertainment...


Common Mistakes Players Make When Choosing an Online Casino Platform
Click to rate this post! [Total: 0 Average: 0] Choosing an online casino sounds simple at first. A player can...
Comprendiendo las Funciones de Seguridad para Decidir si play365 es confiable
Click to rate this post! [Total: 0 Average: 0] La seguridad es un tema crucial en el mundo del juego...


A Trusted Name in Online Sports Betting and Casino Entertainment
Click to rate this post! [Total: 0 Average: 0] In the fast-growing world of online entertainment, sports betting and casino...


Minecraft Hosting and Multiplayer Setup: Java, Bedrock, and Server Performance
Click to rate this post! [Total: 0 Average: 0] A strong multiplayer environment begins with a stable server. Smooth performance...


Safe Ways to Play Unblocked Games at School or Work
Click to rate this post! [Total: 0 Average: 0] Unblocked games have become a popular pastime for students and employees...


The Role of Secure Servers and Tech Behind Mega888’s Smooth Gameplay
Click to rate this post! [Total: 0 Average: 0] Most players do not consider servers, encryption, or backend support when...

Scope, Stance, and Breathing: The Fundamentals That Actually Matter
COUNTER-STRIKE 1.6 IN 2026
International Casino Operators Expanding into Canada: Key Trends and Regulatory Insights

Indibet GT vs LSG Narendra Modi Stadium Win Trends & Odds
การทำความเข้าใจฟีเจอร์ของเกมสล็อตผ่าน ทดลองเล่นสล็อต ก่อนเริ่มเดิมพัน
Ten Ways Lightweight Games Continue to Attract Casual Players

Online Exchanges vs. The Nearest Bitcoin ATM: Which is Faster for Local Cash?

Elevate Your Beauty Skills With an Eyelash Extension Course
Common Mistakes Players Make When Choosing an Online Casino Platform

The Ultimate Guide to Buy Mens Suede Jacket the Right Way
-

 Finance3 years ago
Profitable Intraday Trading Advice For Novices
-

 Gaming2 years ago
Pixel Speedrun Unblocked Games 66
-

 Gaming3 years ago
Subway Surfers Unblocked | Subway Surfers Unblocked 66
-

 Internet3 years ago
Welcome to banghechoigame.vn – Your One-Stop Destination for Online Gaming Fun!
-

 Gaming3 years ago
Minecraft Unblocked Games 66 | Unblocked Games Minecraft
-

 Gaming3 years ago
Google Baseball Unblocked | Google Doodle Baseball Unblocked 66
-

 Internet3 years ago
Premium Games Unblocked: Unleash Your Gaming Potential
-

 Gaming3 years ago
Tunnel Rush Unblocked | Tunnel Rush Unblocked 66